How to Find / Trace My Switch off Android Phone

How to Find / Trace My Switch off Android Phone

Smart Phones have become integrated part of the lives of people as they not only help to make calls but also allow them to browse internet and make payments. It stores confidential information; therefore security of the phone is of paramount importance to the users. In case, the mobile gadget is stolen, the loss can be bigger than the loss of money wallet. In order to track the cell phone, use its inbuilt attributes and access the data for advanced management.

How to track a lost phone that is switched off

How to track a lost phone that is switched off

Ring the phone:

If you have accidently misplaced the phone in the house and want to get it quickly without the loss of data, use its device management tools from the web browser on the computer and tablet. They can find the exact location of the phone within 25 min radius and can ring the phone even if it is on silent mode. It is one of the fastest ways to find the device however would not work with phone which is turned off.

Lock down:

Device manager is an important application that would not only able to track the phone kept in the house or in close vicinity. If the remote device management is switched on, you can lock the phone and change the password from your laptop. With the help of the application, you can easily restrict the data access to thief. In order to use the remote management feature, the phone should be switched on. Even if it is off, the remote commands kicks in once it is turned on by the miscreants.

Delete the information:

Once the remote device management kicks in, you can take precautionary steps to secure information from the thief or hackers. Device manager can be configured to delete the data remotely, as soon as the phone is switched on. Even after tracking, the phone is not found; it is probably the safest step to make sure that your personal data is not compromised.

Tracking by the IMEI number:

Although users do not have the right to undertake IMEI tracking, they can contact the mobile network operator who would help to monitor the location of the phone even if it is switched off. The
If you are an apple phone user log in to the icloud account with the help if the Apple ID. Once on the login page, click on the Find my phone button. It will provide list of options if you have more than one device configured to the virtual manager. Mobile can be easily tracked down if it is switched on.
If you are a window phone user, visit the window website and click on find my phone option in the browser. Once invoked, it can provide detailed map of the lots mobile gadget.

Usage of the Drop box camera:

Drop box can play a very important role in tracking the phone, if the application is installed. The phone should be online and camera upload setting in the application needs to be switched on. If the thief is using camera on the stolen phone, the drop box can instantly send the images remotely to the laptop of the owner.

Anrdoid Tricks - Insufficient Space On Device while Downloading

How To Fix “Error Downloading There Is Insufficient Space On Device” On Android ?

Anrdoid Tricks - Insufficient Space On Device while Downloading

Method 1:-

When you don’t have enough storage space available in your device.

If you are running low on storage on your android smartphone, here are a few tips for you that can help you get rid of “Error Downloading- insufficient space on device”. Then, you can resume installing apps on your Android device from the Google Play store.

  • Uninstall unnecessary apps.
  • Clear Cache.
  • Delete Junk files.
  • Move media to SD card.
  • Transfer photos to cloud storage.
  • Clear Content of less used apps.


Method 2:-

Even if you have sufficient storage available on your Android device, Google play store might show “Error Downloading there is insufficient space on device”, and here is a method to fix it.

Step 1. Go to Settings > Applications.

Step 2. Swipe to “All applications“.

Step 3. Scroll to the Google play store app and open it.

Step 4. Click on “Clear Cache” & “Clear Data

Step 5. Reboot your phone.
play store app info android


Method 3:-

If Method 1. Doesn’t work for you, then you need to reinstall your Google Play store app.

Steps To Reinstall Play Store To Fix Error Downloading There Is Insufficient Space On Device” are:

Step 1. Go to Settings > Applications.

Step 2. Swipe to “All applications“.

Step 3. Scroll to the Google play store app and open it.

Step 4. Click on Uninstall updates.

uninstall updates google play store

Step 5. Reboot your device.

Step 6. Open the play store once, and keep the device connected to the Internet while your phone updates Google Play tore in the background.

Once the update is complete, you can resume installing apps on your phone from the Google play store.

In conclusion, We strongly hope the above guide helps you remove “Error Downloading there is insufficient space on device” for your Google Play Store. For any queries, write to us in comments below.

How to Replace Kingroot with SuperSU in Any Android

How to Replace Kingroot with SuperSU in Any Android

hello friends today's post i am going to tell you the easiest way to replace your kingroot to super su. super su is very successful way to run rooted apps in android phone. In this guide you will learn all about how to remove/replace Kingroot/Kinguser with SuperSU/Superuser app in any Android phone. Rooting Android device is normal nowadays. It’s the process which unlocks your Android phone fully. You can access all internal features of your device by it. After rooting user gets access to the Superuser. It’s something whose permissions are required whenever you tries to make changes in Root of your Android.
How to Replace Kingroot with SuperSU in Any Android


Requirements To Replace KingRoot With SuperSU

For removing or replacing Kingroot with Superuser on your device, you must need some basic requirements as followed below. Check them out and remove Kinguser with Superuser easily on any Android phone.

  •     Rooted Android Device – Read: How To Root Android Without PC
  •     Download & Install Terminal Emulator app.
  •     Download Replace_Kinguser_with_SuperSU Zip File.
  •     Zip File Extractor App (Like: Es-File Explorer)

Replace Kingroot with SuperSu (Simplest Way)

It’s the easiest and simplest way to replace Kingroot with SuperSU on any rooted Android device. You just have to install SuperSU app from Play store and uninstall Kingroot from your device. That’s it. Let me explain step by step:

  •     Open Play store.
  •     Search for SuperSU & Install it.
  •     Open it and give permission as a Superuser.
  •     Now, uninstall Kingroot app.
  •     Update SuperUser Binary and Reboot your phone.
  •     Voila!! That’s it.
So guys, it’s the first and easiest trick to replace Kingroot with SuperSU. But if this one doesn’t works for you, you can try out second method followed below.

Read More:-How to Permanently Block ADS from Android without Root


Read More:-HIDE ROOT TRICKS - Hide root in Android phone easily from Apps

Read More:-Root Any Android phone without pc - Latest Android Trick


How to Get 5GB Free Internet on Airtel

How to Get 5GB Free Internet on Airtel
hello Friends if You Are Looking For Airtel Latest Trick to Get 5 GB Internet in Your Airtel Sim card then You Should Follow Below Airtel Tricks. in This Trick you Will Get 5 Gb Internet Data for Free in Your Airtel Sim. So Follow These Steps and Get Airtel Free Internet Data.

How to Get 5GB Free Internet on Airtel

1.First of all download Airtel Official app – CLICK HERE

NOTE:If you are existing user then login with username and password

2.Now you have to Enter Your mobile number and Verify it.

3.Once you are verify or login then you will see banner on Home page of Airtel app.

 ” That is My Jackpot Offer

4.You have to download and install Wynk app – Android || IOS

5.Now you have to complete some easy task to win free data.

Read More:-airtel tricks - airtel online recharge Tricks
 
6.You need to complete 11 steps which is need to get Airtel jackpot offer.

5.After completing all task you have to go back on my Airtel app  and you will get redeem option.

Terms & Condition For free Data pack:

1.Free data can be used only from 12AM to 6AM

2.Any outside of this hour the data will be deducted from users data pack.

3.Offer valid till 31st August.

4.Applicable only once per user

Read More:-Airtel Whatsapp Hacking Tricks - Now Enjoy Free Whatsapp on Airtel

Use Jio Sim In for Use Internet - Jio Apn ip Address

Use Jio Sim In for Use Internet - Jio Apn ip Address
helo Guys , Are You Searching Best Way to use Reliance Jio Sim Card for Fast internet then Here we provide You the way To Use Reliance JIO SIM In Windows Phone, Android Phone, Iphone, and pc as a Dongle,  in This Reliance Jio trick you Have To Follow some Steps that you can see Below.


How To Use Reliance JIO SIM In Windows Phone:

  • First of all open your Settings by moving to the App Drawer.
  • Scroll down and find SIM Settings there or Network Settings. (As per your version)
  • You need to select mode as 4G or Highest Connection Speed.
  • Now select JIO SIM and click on Add APN.
  • You need to add some details which are given below.
  • Do not add anything extra rather than this.

APN: Jionet

IP Type: IPv4

  • Keep the other fields empty and do not add anything extra to it.
  • All done, now save it and restart your phone.
  • Turn your Data Connection on and enjoy this awesome trick.


Steps To Change WiFi MAC Address in a Minute

Steps To Change WiFi MAC Address in a Minute
hello Guys if You Want to change Your Wifi mac Address of Your Android Phone Then You Can Change Wifi Mac Address in Couple of Steps. this is the Best Easy Way to Change Your Wifi Mac Address.
Steps To Change WiFi MAC Address in a Minute
First of all, WiFi is a great technology for modern gadgets. Since most of our phones, laptops and appliances use WiFi to connect to each other and the Internet. Because WiFi offers a very fast and reliable wireless connection, it is widely accepted all around the world. As the connection is wireless, security maybe a major concern for users. Even though WiFi has secure passwords while connecting, there are furthermore security measures. Each device has a MAC address (Media Access Control). This address is the identity of a device on a WiFi network. It unique for each device and is saved in the device by the manufacturer. To change the identity of your device on a WiFi network, you need to change your WiFi MAC address. This cannot be done easy, therefore we have a guide for you on How to change WiFi MAC address on Android. You can follow the given trick to easily change the MAC address of your Android smartphone.

How To Find WiFi MAC Address On Android.

To check the current MAC address of your Android phone, follow the given steps.
Step 1. Go to Settings. Then tap on WiFi.
Step 2. Now, in option, go to Advance.
Step 3. Scroll to the bottom. Here you will see your IP as well as WiFi MAC address.

How To Change WiFi MAC Address On Android.

If you want to change the MAC address of your Android smartphone, follow the steps given below. They probably will seem a little complicated, but follow them one at a time and you can easily change WiFi MAC address on Android.

Note:-  You need a Rooted Android smartphone for this tutorial to work. To know more about rooting, click How To Root Android

Step 1. Make sure you have BUSYBOX installed on your phone. It is very essential for this guide to work. If not, then download it from the link below.

Download From Playstore 

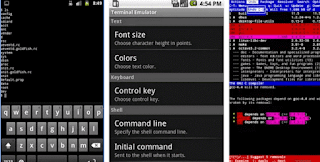
Step 2. Install a Terminal Emulator. You can install one from the Google Play store link given below. A terminal app lets you run Linux based commands on your Android smartphone. Download From Playstore

terminal emulator

Step 3. Open the Terminal app and type the commands given.

$ su [HIT ENTER]
$ busybox iplink show eth0 [HIT ENTER]
You will now see your MAC Address.

Step 4. Then enter the following command.

$ busybox ifconfig eth0 hw ether XX:XX:XX:XX:XX:XX [HIT ENTER]. (In the above command, replace XX:XX:XX:XX:XX:XX with your new MAC address)
You have now spoofed MAC address on android successfully.

Read More:-How To Recover Deleted Files From Android Internal Memory (3 Method)
 How To Recover Deleted Files From Android Internal Memory (3 Method)
Read More:-Steps To Control Any Android Phone From Computer / Pc
 Steps To Control Any Android Phone From Computer / Pc

how to change your name on facebook Before 60 Days

how to change your name on facebook Before 60 Days
hello Guys looking for ans of how do i change my name on facebook Account Name. then Here You Will Find Solution to Change Your Facebook Name Before Time Limit. with 100% Result.
how to change your name on facebook Before 60 Days

Now A Days, I Have Noticed That Facebook Is Not Allowing Name Change Before 60 days..That Is, If You Have Changed Your Name Today, You Will Have To Wait Next 60 Days To Change Another... In This Post, I Am Going To Share 2 Methods To Change Your Facebook Name Before 60 days. First One Is Official & Second One Is The Un-Official Which Contains The Tricky Part Of Name Change.. So, Here Are Those Methods... 

Go Step By Step Method 1 Official Method As per facebook rules, the profile name which you use should be your real name as it would be listed on your credit card, student ID, govt- issued proof etc... 

So I personally suggest everyone to keep your facebook account of real name without any fonts or special characters... So if your profile name limit is exceeded, Or Its Showing That You Can't Change It Before 60 Days, and want to change your facebook profile name to real name, 

Note => You Can Change Your Real Name Only, As It Would Be Listed On Your Documents. Because You'll Have To Upload A Scanned Photograph Of Your Documents 
1. Go To Name Changing, Facebook Contact Form =>Click Here 
2. Fill that form and you have to upload your valid Government-issued Proof-photo ID like a Passport or Driver's license etc. 
3. When your upload finishes finally click "Send" button... Any 1 Proof will be enough in the list of below examples. Examples: > Green card, residence permit or immigration papers > Birth certificate > Personal or vehicle insurance card > Marriage certificate > Official name change paperwork > Voter ID card > Non-driver's government ID (ex. disability, SNAP or national ID card) 
Note - If you don't have a government- issued Proof- photo ID, you can submit copies of any 2 other documents that together show your full name, birthday and picture... 
Any 2 Proofs will be needed in the list of below examples, Examples: > Credit card > Utility bill > School or work ID > Library card Check > Bus card So when you submit your proofs, facebook staff will verify it and they will change your name to the real name as which was listed on the proofs that you submit. 
This whole process may take 4-5 days or 6-7 days like that... But i can't say any exact prediction that they will change our name within the specific time. Mostly it will take 4-7 days. Also note that, when facebook staff verifies your proofs and changes your name, then you won't be able to change your name again in future. 
All previous names which you had in your account will be removed. Only the new name will be seen and it will permanent. Method 2 Un-Official In This Trick, I Will Use A Common Sense & It Will Be Convert Into My Name Change. Note => By This Trick You Can't Change Any New Name, Which You Haven't Used In Your Account. That Is, You Can Change Only Your Prev. Used Names Now, Go By The Following Steps & Change Your Name For Better Understanding Of All Of @http://trickforever.blogspot.com , I Am Adding Snapshots For This Trick. 
1. Open Any Mobile Browser & Log- In Tom.facebook.com 
2. Now Click Here Or, Manually Visit This URL => m.facebook.com/hacked 
3. After Visiting This Link, It Will Lead You To The Facebook Page, And Ask To Enter Your Password. Dont Worry About Your Privacy, It Will Be The Original Facebook Web. Enter Your Fb Password Without Any Hesitation 
4. Click Continue & In Next Page Facebook Will Say You To Secure Your Account.. See Below Screenshot Now, Click Continue 
5. On Next Page, Again It Will Say That Secure Your Account, Just Click Continue 
6. Now, Facebook Will Ask You To Enter A New Password That Have Never Used Before On Your Account, Just Enter It Two Times & Hit Continue. 
7. Now Facebook Will Ask To Verify Some Recent Changes, Like Adding Apps & Email Changes 
8. Just Follow Those & Continue 
9. Now, Facebook Will Ask You Name Changing, & Show You The Full List Of The Names, You Have Used 
10. Choose Your Desired Name & Continue.. Voila, You Have Changed Your Name. Bypass Any Other Verification, If It Comes. Now Your Account Is With Your Desired Name. Thats It Guys... Hope That You Can Change It Now. Any Problems ? Feel Free To Ask In Comments ! Dont Forget To Share My Blog With Your Friends !

Read More:-How To See Who viewed your facebook profile?
 How To See Who viewed your facebook profile?
Read More:-100% Tested Facebook hack password of Anyone with evidence
 100% Tested Facebook hack password of Anyone with evidence